Your cart is currently empty!

Tag: howto
-
Ouai Hair Mask Is A Miracle For Damaged Hair


Are you someone who is struggling with dry, brittle hair? Have you noticed how difficult it is for your hair to retain moisture and oil in thick coils? Lastly, is your hair unhealthy because of its dryness, split ends, heat, chemical, or color damage? If you responded ‘yes’ to any of those questions, then; I have the perfect solution for you! The time is up for dry, damaged hair! Ouai hair mask is the best solution to repair and heal thick, dry and damaged hair.
DISCLAIMER: Heads up! My posts contain affiliate links. Above all, if you buy something through one of those links, you will not have to pay a penny more, but I receive a small commission. In other words, it helps keep the lights on. Thanks!
Before we explain how the Ouai hair mask is the best solution for hair damage and dryness (and why you need to use it), let’s discuss how THE LEWK discovered this haircare miracle. I received this product complimentary from Influenster; in exchange for my honest opinion. I have been an Influenster affiliate for a year now, and that means I get to test and review hundreds of products to help consumers make easier shopping decisions. Please check out the other beauty products I’ve reviewed for Influenster in previous blog reviews.

About Ouai Hair Mask
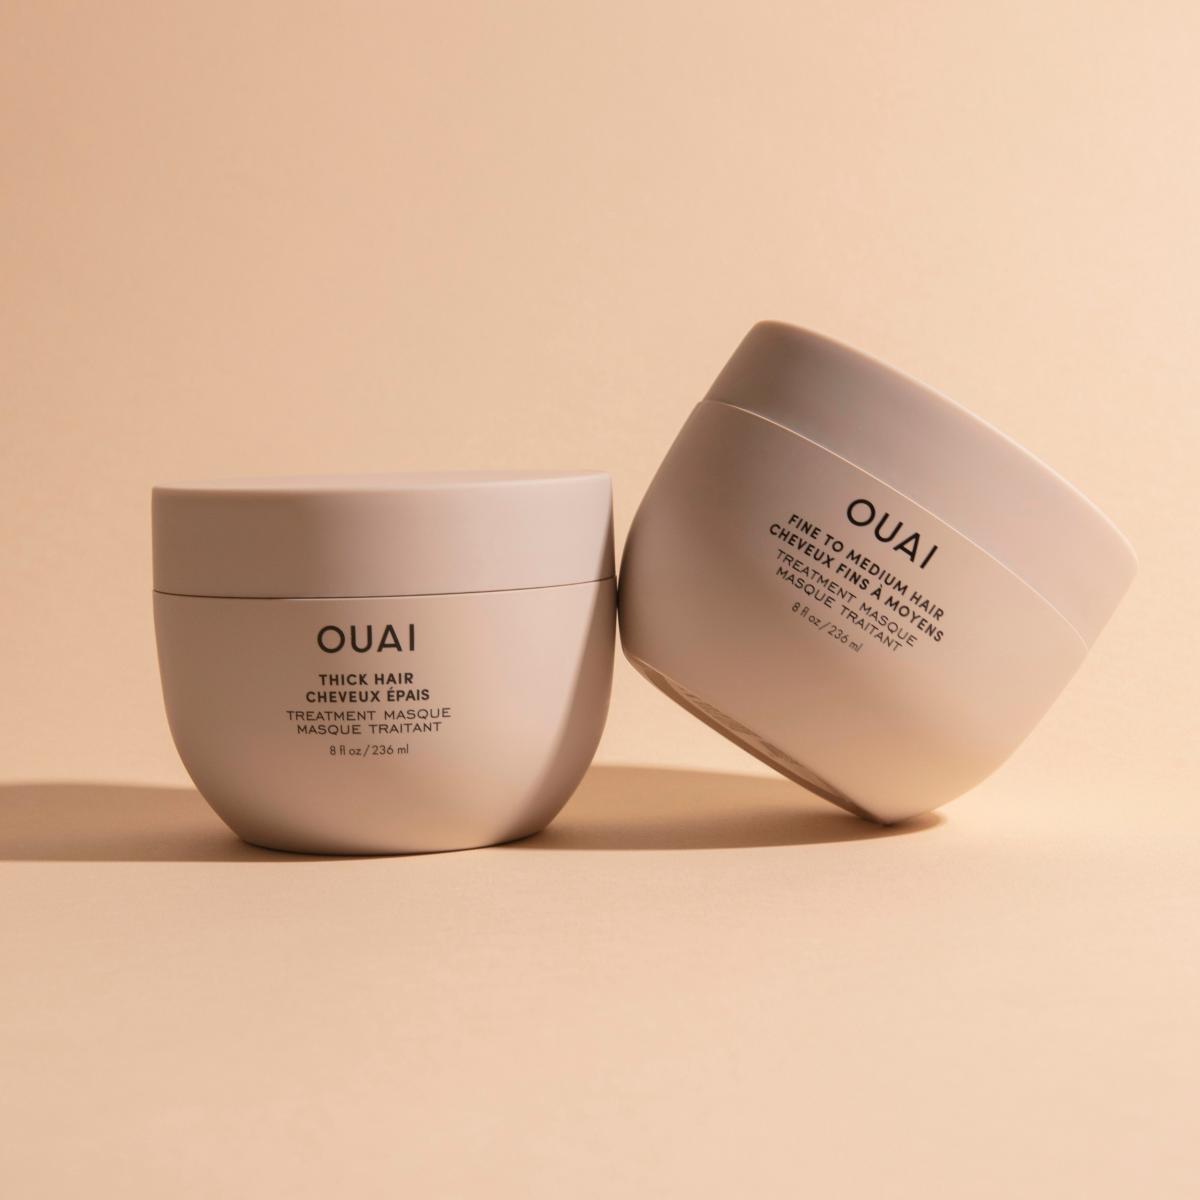
The Ouai (pronounced ‘way’) hair mask is a treatment product for hair that restores and revitalizes natural hair textures. It repairs hair damage, restores moisture and hydration, and prevents breakage. The brand offers two options for this treatment mask for different hair types:
- fine-to-medium textures
- thick hair textures
Each mask targets different hair concerns for all hair textures, but there’s one thing that they both have in common: building shiny, manageable, and healthy hair. You’ll want to use the thick hair treatment masque if your hair concerns and goals are:
- hair damage
- anti-breakage
- frizz control
- moisture retention
If thick hair maintenance isn’t your struggle, then; you’ll need to use the fine-to-medium treatment masque to address your haircare concerns. Ouai’s fine-to-medium treatment masque targets:
- repairing split ends
- hydration
- frizz control
- strengthening fine-to-medium strands
Ouai Hair Mask Ingredients

All of the products from Ouai are cruelty, gluten, paraben, and phthalate free. The fine-to-medium treatment mask contains:
- shea butter
- panthenol
- hydrolyzed keratin
Click the jump for a complete list of ingredients.
Additionally, the Ouai hair masque for thick hair contains:
- shea butter
- lillipe butter
- hydrolyzed keratin
- blend of almond, olive, and macadamia oils
Click the jump for a complete list of ingredients.
How to Use Ouai Hair Masks
Both mask products work best when applied to freshly cleansed hair. Next, starting from the ends and working into the roots, apply a quarter-size amount of the mask conditioner. Then, comb through with your fingers. Finally, let the mask sit for 5-10 minutes and then rinse with cool water. You can follow up with your favorite leave-in conditioner for added hydration.
Where to Buy These Hair Mask Products
Are you ready for your next hair miracle? It’s time to break up with split ends and do some damage control. Ouai hair masks are here to heal and repair everything your hair has been through in the name of maintenance. These hair treatments want to deliver smooth, shiny, healthy, manageable hair to your natural tresses! Visit your local Target, Ulta, or Sephora store to grab these haircare goodies!

Sign-Up for The LEWK Newsletter and Get 15% Off!
Do you feel that hair damage, breakage, and split ends aren’t your haircare goals or concerns? Check out the posts below for more hair-spiration and haircare products! Moreover, don’t forget to sign-up for our newsletter to stay in the loop about new haircare product reviews, be the first to know about new blog posts, and receive exclusive discount codes and shopping giveaways!
-
How To Use Influenster: An App Review Guide


Influenster is the #1 go-to app for consumer product reviews and discovery. It is a platform known for showcasing honest reviews from real people in real-time. People love to use Influenster to share their experiences with hundreds of thousands of products. In short, Influenster changed how consumers share reviews and create user-generated content. Additionally, the popular review app underwent a facelift earlier this year and made vital changes to its platform. This post is your guide to navigating the all-new and improved Influenster app! Here you will get a glimpse of how to use Influenster. Let’s learn how the app works, how to leave product reviews, and how to get the surveys that lead to free products. Let’s get started!
Disclaimer: Heads up! My posts contain affilate links. If you buy something through one of those links, you won’t pay a penny more, but I’ll get a small commission, which helps keep the lights on. Thanks!

How To Sign-Up For Influenster and Join the Review Community
Did you know that anyone can join the review community for free? First, you’ll need an email address to get started. Then, once you’ve created a profile, start digging into other consumer reviews to discover new products on the Influenster app.

Welcome to the Influenster Home Page
After you’ve created your new profile, you will then be able to explore the app in detail. The first tab that you should get acquainted with is the home feed. This page will show any tier progress, daily tasks, and a product discovery feed.


Tier Progress
When you complete certain required activities, you will earn tier points. These points will allow you to unlock higher tiers. The higher you go, the better your chances of getting free samples and qualifying for campaigns.
Daily Tasks
To put it simply, completing tasks earns you tier points. There are a variety of activities that Influenster will ask you to complete. Some examples of activities include:
- writing reviews
- answering questions
- referring friends
- completing profile info
- making suggestions and recommendations
- creating polls for feedback
Feed
Your home feed will have recommended reviews based on your interests. You’ll see all of the top-rated products, participate in polls created by reviewers, share your expertise by responding to consumer questions, and connect with the brands you love.
How to Use Influenster to Search
You can use the search tab to look for specific products on the app. To search, type the name of the product or brand. You can even search for a product by barcode. Additionally, you can use the search bar to discover your friends on the app and follow each other.
Find and Follow Me on Influenster!

Since you discovered the goodness that is Influenster by reading this post, you should definitely check out my reviewer profile. I am an active member of the Influenster community! Click the above image to follow me on Influenster to enjoy awesome, fascinating new products and read my reviews.
How to Get Product Samples


Influenster sends thousands of hand-picked samples to its members every month. If you get chosen for a sampling campaign, it’ll show under the sample tab. Moreover, Influenster selects members for product campaigns based on their interests and responses recorded in surveys. In conclusion, it is absolutely critical to complete those profiles after sign-up!
Influenster Profile Set-Up
Customize your profile by adding an avatar and personal details. An email and home address are crucial for receiving free samples! Connect your new Influenster account to your social media channels to amplify your reviews. Next, review your recent activity, interests, and badges, and invite friends to sign-up directly from your Influenster profile.

The new changes to the app made it easier to navigate Influenster. Influenster absolutely knows how to make shopping easy. The new features make it simple to leave reviews and qualify for free stuff. I can honestly say that shopping is convenient when you use the Influenster app. Check out the new and improved website today to see what I mean, and start digging into those reviews!

Sharing product reviews is a special way to connect and engage with online shoppers just like you! The LEWK Digest is a weekly product guide newsletter for consumers to research buying options.
Subscribers receive exclusive product details on many popular beauty, household, and lifestyle products. They also receive store locations, discount codes, promotions, and special pricing on select products delivered directly to their mailbox for free!
-
Trendy 4C Hairstyles for Natural Hair

Whether you’re in the beginning stages of transitioning to natural hair or you’ve been natural for some time, you have to admit that styling natural hair is challenging. Learning how to care for your texture is a lot of trial and error. Sometimes natural hairstyles can be a bit of trial and error too. When I stopped getting relaxers and started to transition my relaxed hair to my natural hair, it was hard to find 4c hairstyles I liked. Then, I would meet other Black women with 4C hair, and they would say the same thing (and some still do).
It’s been helpful to see influencers and celebrities with 4C hair embrace their texture and coils in the entertainment world. Since the reemergence of the natural hair movement in the early 2000s, women with 4C hair can see more ways to style and manage their hair. In conclusion, this post has eight classic, trendy 4C hairstyles. Each hairstyle is a beautifully versatile protective hairstyle with low-med maintenance. However, you can apply any natural hairstyle on this list to any hair texture.
Beauty Tip: If you’re really feeling like taking these 4C hairstyles to the next level, try experimenting with color, braiding hair, or clip-ins (extensions).
Disclaimer: Heads up! My posts contain affiliate links. If you buy something through one of those links, you won’t pay a penny more, but I’ll get a small commission, which helps keep the lights on. Thanks!
Is It Hard to Maintain 4C Hair?
A common myth about 4C hair is that it is non-manageable because of tight coils and hard to keep moisturized. Although styling 4C hair can be challenging, 4C hair is not hard to maintain. The key to 4c hair is to moisturize. The right moisturizer will protect 4C hair from frizziness, shrinkage, breakage, and sluggish hair growth.
Tools For 4C Hair Texture Hairstyles
Every hairstyle will require tools. Here are some popular hair styling tools used when styling 4C hair:
- Edges Brush
- Detangling Brush
- Hard Bristle Brush
- Styling Gel
- Bobby Pins
- Hair or scalp oil
- Leave-in conditioner
- Moisturizer
8 Simple and Easy 4C Hairstyles
1. Flat Twists
The flat twist hairstyle is super trendy and a popular go-to hairstyle for natural hair. To clarify, flat twists consist of two twists done to the scalp. This twist hairstyle is a protective style that eliminates daily maintenance and creates a path to healthier hair. Twists are versatile and worn in just about any method (from twist-outs to updos).
4C Hair Flat Twist Tutorial 2. Mohawk, Fauxhawk
Mohawk hairstyles for natural hair are so much fun! Many naturalistas rely on the mohawk (a*k*a the frohawk) to create trendy updos. This hairstyle gives many opportunities for geometrical parting, adding braiding hair, and accessories. To start, brush the hair upward towards the center of the head or crown.
How-to Mohawk on 4C Hair 3. Halo Braid

Credit: CurlCentric.com The halo braid is a cornrow-style braid that wraps around the head. This plaited protective braid is the halo effect and is a beautifully elegant hairstyle worn casually or in glam. The halo braid has been famously seen before on many high-profile celebrities such as Beyonce, Ciara, and Tracee Ellis Ross.
How-to Tutorial for Halo Braid on 4C Hair 4. Twist Out

Source: @curldaze IG The twist-out hairstyle is one of my favorites. Next to box braids, the twist-out is a regular go-to protective hairstyle. Twists are a popular protective style that can create uniformity throughout natural hair. A twist-out style is a method of unraveling stranded twists. If you are going to recreate this hairstyle, the key to a successful, beautifully curly twist-out is to lock in moisture.
The Perfect 4C Twist-Out Tutorial 5. Afro
An afro hairstyle is perfect for showing off coils and hair texture. The afro first gained its popularity during the Black Panther movement. This hairstyle gets rocked from puffs to curls and tapered designs. Many high-profile celebrities have sported the afro hairstyle in glam and everyday casual aesthetics (Erykah Badu, Jill Scott, Marsai Martin, Solange, Lupita Nyong’o, Ebonee Davis).
The Perfect Afro Tutorial for 4C Natural Hair 6. Space Buns
Although I am not too fond of their name, the space buns are fun, festival beauty trendy, and sassy! The space buns hairstyle is two high buns on both sides of the head. Easy and simple. Space Buns on natural 4C hair showcases coils and curls like no other hairstyle that made this list.
Space Buns on 4C Natural Hair 7. High Bun

Credit: @jascmeen IG If you are looking for something similar to the Space Buns hairstyle, you will want to try the High Bun. This classic hairstyle is a part of the “Everyday Essentials” starter pack. The High Bun is the hair sleeked together in a bun that sits at the top of the head. This hairstyle is a beauty favorite for convenience and low maintenance.
High Bun 4C Natural Hair Tutorial Half Up/ Half Down
The half up half-down hairstyle on curly, natural hair is another idea for an everyday casual look. To create this hairstyle, first, gather the top half of the hair into a high bun. Next, leave the back half down. If you want a lot of volume with this hairstyle, clip-ins would really take it to the next level.
Articles Related to Trendy 4C Hairstyles for Natural Hair
Want More 4C Hairstyles?

Subscribe to the product guide newsletter, The LEWK Digest, to get the products mentioned in this post, or learn more about how these products can help promote healthy hair growth and protect 4C hair. The LEWK Digest has reviews from women who have tried out these products and seen results!
-
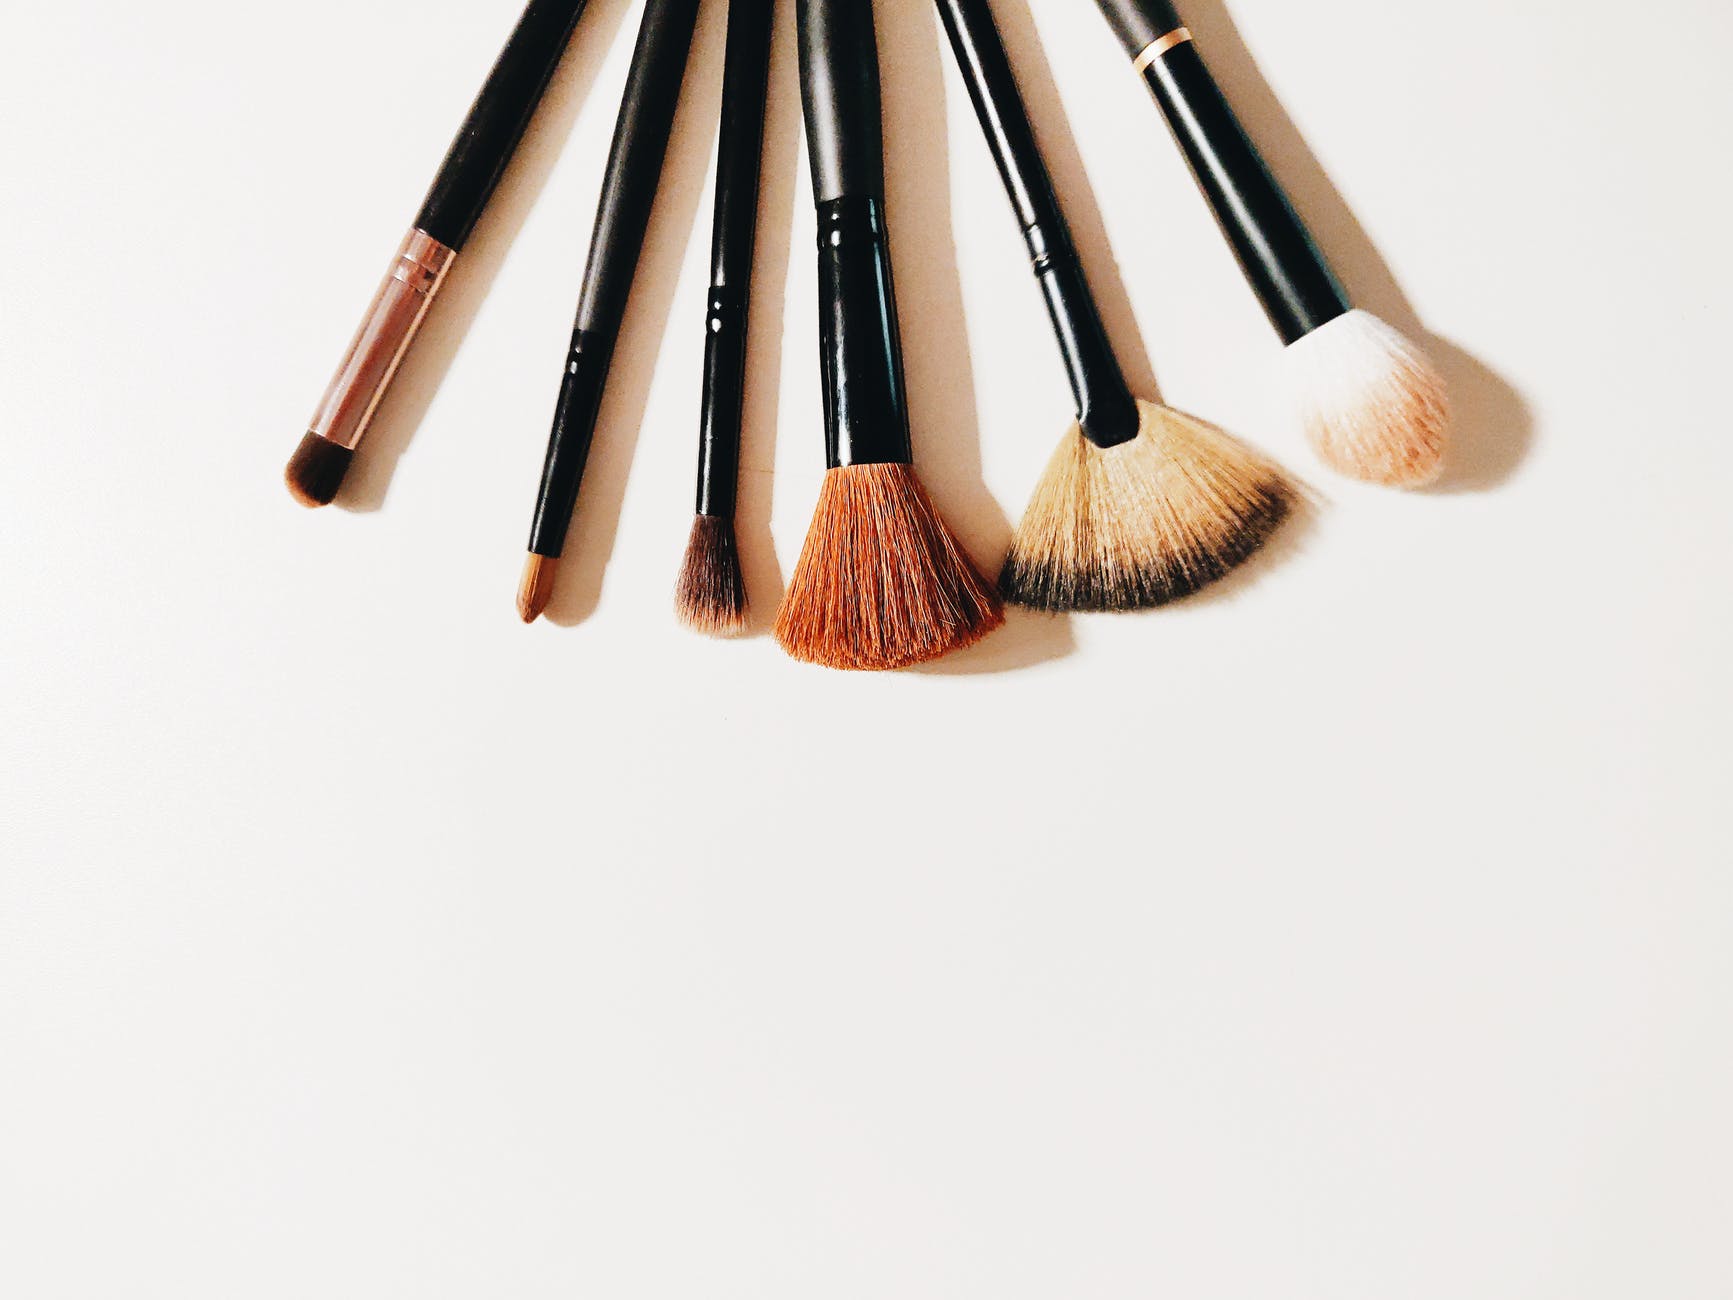
7 Makeup Tips and Hacks No Girl Should Live Without


Flawless makeup is the ultimate beauty goal.
It’s easy to unlock this achievement with the help of makeup artists (MUAs) and beauty experts. However, the makeup application process at home is much different. For this reason, it is absolutely impossible to have too many makeup tricks. You should always learn new makeup tips and hacks to enhance the application process. Like, why struggle with lashes or eyebrows when there are so many makeup tips and hacks to make the process easier?
I am not a makeup artist. I am someone who loves and wears makeup often and can share what she knows about makeup. This post contains seven makeup tips and hacks for applying makeup and creating beautiful, flawless makeup at home. Anyone can do these makeup hacks. Keep scrolling to read more about what makeup tips you should not live without. Ever.
Disclaimer: Heads up! My posts contain affiliate links. If you buy something through one of those links, you won’t pay a penny more, but I’ll get a small commission, which helps keep the lights on. Thanks!
Sign up to get product guides to the beauty products mentioned in this post delivered to your inbox. The Lewk Digest is a weekly newsletter for all the products mentioned on It’s The Lewk.
Makeup Tip # 1: Apply Foundation Before Concealer
The “foundation before concealer rule is golden and is the principle. Starting with one layer of foundation will help minimize any redness or discoloration. The goal: is to create flawless makeup. Next, follow up with concealer to cover additional redness, spots, and blemishes.

Dior Backstage Face and Body Foundation Buildable/Medium Coverage

Fenty Beauty Pro Filt’r Hydrating Longwear Foundation Medium/Full Coverage

Rimmel London Lasting Finish 25HR Hydration Boost Full Coverage Lightweight Foundation
Makeup Tip #2: Put on lip balm or scrub before applying lipstick
Pucker up and get ready to exfoliate and moisturize those lips! Matte lipsticks are notorious for not gliding on smooth. Try this genius hack to buff away dry skin before applying lipstick. However, if you’re using lip scrubs, do not over-exfoliate! Lip scrubs are to be applied once a week max (anything more and you’ll risk irritation).

Fenty Beauty Universal Lip Luminizer

M.A.C Cosmetics Lip Conditioner
Makeup Tip #3: Look down to apply false lashes
Putting on false lashes is a struggle. However, this simple hack can make any lash application less problematic. The mission: after the lash glue has dried, grab a mirror and hold it downwards to look into it. Then, start the lash application process.
Makeup Tip #4: Use spoolie brushes to tame brows
Whether or not you plan on filling in those eyebrows, you need to get yourself a spoolie brush a*k*a mascara wand to tidy your brows. Spoolie brushes are great for keeping those tiny brow hairs in place. These brushes are inexpensive and easy to buy in bulk.

Disposable Eyelash Mascara Applicator Wand
Makeup Tip #5: Applying lip liner gives the illusion of fuller lips

The ‘fuller lips’ cheat code is activated when applying one of two methods. Method one is filling in your lips with a liner the same shade as your lipstick. Method two is drawing over your natural lip line with lip liner, also known as overlining your lips. Both methods for using lip liner are considered ideal for long-lasting wear and coverage.
Makeup Tip #6: Use highlighter for eyeshadow
Highlighter is for accentuating the highest points of your face, and while it is for cheekbones, it is just as useful for the rest of the face (Vogue link). Since the goal is to create flawless makeup, highlighter is what every beauty lover needs in their makeup collection. Apply the highlighter in the inner corner of the eye and brow bone to lift the eyes. Then, have a little fun with other parts of your face. Try this: add highlighter to the bridge of your nose to make it appear thinner.

Fenty Beauty Killawatt Freestyle Highlighter

M.A.C Cosmetics Soft and Gentle Mineralize Skinfinish
Makeup Tip #7: Use setting sprays/powders for long-lasting makeup
After you finish applying makeup, the last thing you want is for your fresh new face to get messed up before leaving the house. Apply setting spray (or powder if that is your preference) to lock in makeup and avoid smearing. Setting your face with spray or powder prevents caking and creasing. Think of it as if you’ve just finished mixing together all the ingredients for a cake. Now, you’re ready to bake.

Fenty Beauty Pro Filt’r Instant Retouch Setting Powder
Enjoying these makeup tips and hacks? Check out these similar posts:
-
How To Outline A Blog Post in 15 Minutes

How long does it take you to write a blog post? This question is one I see bloggers ask each other all of the time. I’ve even googled it out of desperation and curiosity to figure out the answer. It takes a blogger approximately 2-3 hours to write a quality blog post. I started comparing my writing performance to the responses of other bloggers. How to outline a blog post efficiently? Is two hours enough time to brainstorm a blog topic, gather thoughts, and still have enough time to write it?
There are many ways to outline a blog post!
Some bloggers do not take as much time as others to write their blogs. Don’t worry. The last thing you should do is compare yourself to another blogger’s writing schedule. The best advice for figuring out your writing schedule is to create a consistent timetable that works for you.
I would not recommend adopting another bloggers’ writing schedule, but I would recommend learning the strategies that helped them develop the blogging schedule that works for them. This blog post highlights one of the best tools bloggers use to publish quality blog posts — blog outlines.
Blog outlines are simple tools for bloggers to draft, write and organize their ideas for a blog post before publishing.
this guide will cover:
- how to spend less time planning out a blog post
- what to outline for your blog post
- examples of blog outlines
- how to outline your next blog post in 15 mins
How To Spend Less Time Planning Out A Blog Post
If you are spending more than the average amount of time it would take to write a blog post, you are most likely doing this:
- struggling with coming up with topics
- researching while you write
- not passionate about the topic you chose to write about
One thing that will help cut out much of the time you spend writing is to start drafting your blog posts in advance. Developing a blueprint for your blog posts gives you more ideas for what you will be discussing in your post. It can not be easy to juggle all our ideas for one topic & without drafting or jotting them down, we will forget them. Start sketching your blog posts & researching topics thoroughly before committing to writing the post.
Need help brainstorming topics you should write about? Check out this list of 350+ blog topic ideas for any niche!

How To Outline For Your Blog Post
Are you looking for ideas for what to write on your blog post outline? First— you will need a topic. The topic you chose needs to be something you can talk about comfortably and freely. Next, you will need:
- Key subheading content points
- Supporting statements for that subheading
- Affiliate links for any suggestions for readers
- List of keywords and tags for search engine optimization
You can even take it a step further and create a checklist/to-do list for each step in your writing process. To-do lists and checklists for your blog post will help you remember to edit, format, schedule, publish, create pictures, etc. Here is an example of what a blog post outline should look like:
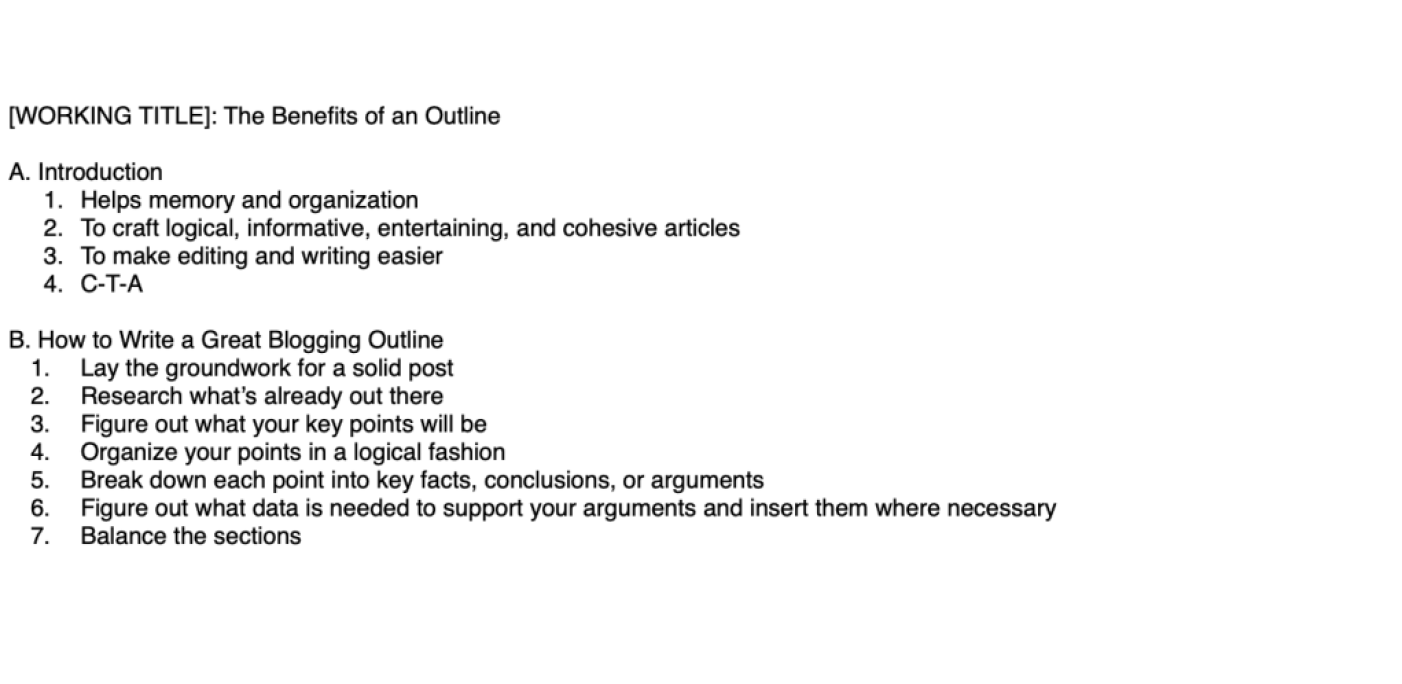
example of a blog post outline A Simple Blog Post Outline
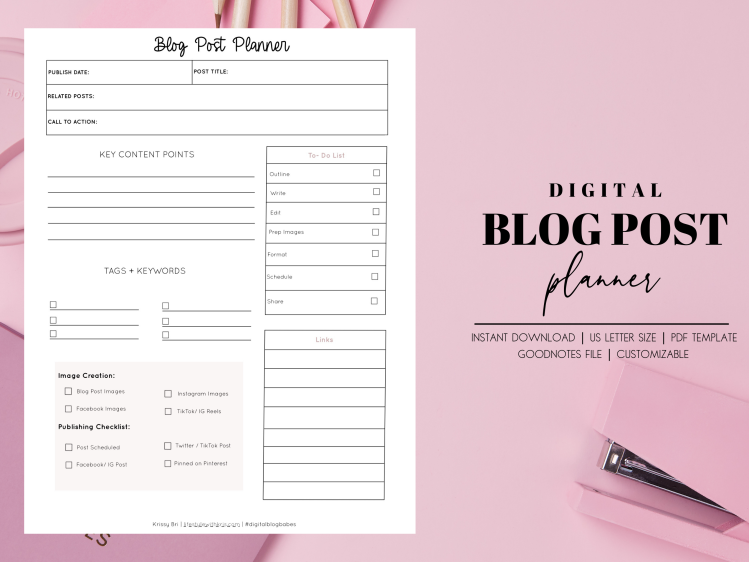
Ready to start outlining your next blog post? I have the perfect blog post template for bloggers planning out their blog posts. I created this template to help with organizing and writing ideas for quality blog posts. The Blog Post Template is a digital pdf that you can download and save to any digital planner or notetaking application. This digital template is designed to help bloggers brainstorm post titles, publish dates, related posts, call-to-action, and key content points. The digital blog post template has checklists and to-do lists to keep bloggers on track with outlining, writing, editing, formatting, and scheduling their blog posts. The template also includes space for tracking tags, links, and keywords.
Click the jump to get your blog post template and start planning your writing content today.
Never have to worry about writing quality blog posts again! To keep your readers engaged, your blog posts have to be cohesive, entertaining, informative, and easy to read. It’s easy to write and have all your thoughts jumbled at once while you’re trying to remember to get all of your ideas out!
Use this Blog Post Planner template to avoid never having to worry about jumbled thoughts, incohesive paragraphs, and sloppy structures ever again! This Blog Post Planner template was designed to help bloggers and writers get their key points across, create blog outlines before writing, and checklists for blogging tasks.
Bloggers should be using outlines when preparing to write quality blog posts. Using an outline before you write helps you create thought-flowing, entertaining posts & cuts down on how much time you would usually spend writing your blog posts. You can easily create an outline for your next blog post in 15 minutes! Outlines are another tool to help you stay consistent with blogging & they will also help with coming up with ideas for additional blog post topics!
Was this helpful? Leave me a comment below.
-
What Is Seo And Why Is Seo Important For My Website?

Search Engine Optimization is a vital digital marketing tool.
Picture this. You own, manage, and run your own website. Your website is filled with entertaining, informative, and valuable content, but no one is reading it. You’re stressed because you’ve spent so much time, energy, and money invested in your website. However, it’s not thriving due to low or no traffic. You want to know how to increase your website traffic because you are passionate about seeing your business succeed. You landed here because you discovered SEO during your research, and you have no clue how to increase your traffic. You’re also not sure if you really understand how SEO works and how important it is.
SEO consists of many elements. Knowing what they are and how they work is key to understanding why SEO is so important.
Search engine optimization is crucial for your website because it helps make it more visible. This then equates to more traffic, builds brand awareness, and positions you as a trustworthy expert in your niche.
This post discusses the importance of SEO for your website and how to use SEO to rank on search engines. You will have a better understanding of how SEO works and a step closer to increasing traffic to your website.
Quality Content is what Search Engines Look For
Content is the most vital part of Search Engine Optimization. It is what the people will see first when they visit your website. The content you create is what you use to reach and engage with your target audience. You most likely know by now that you should be creating and posting content that readers will find valuable. Quality content varies in many forms for many website creators (blogs, videos, podcasts, e-books) and needs to be shared consistently to rank on search engines. A lot of content = a lot of chances to increase your website’s online visibility.
For example, website pages and posts should have a minimum of 500 words for search engines to crawl the content on your pages. Even then, depending on which SEO expert you’d ask, they would say 500 is considered to be generously low and should really be around 700-800 minimum words. Valuable content is just one key element to increasing traffic with SEO.
Keywords Will Help Search Engines Find Your Content
Your content will also need to feature some keywords to rank higher on search engines. Keywords are words and phrases that consumers use to find what they are looking for online; and that brands can then use to connect with prospects looking for their products and services.
Finding out what keywords you’ll need for search engine optimization is not a simple task. A general rule of thumb is to look for keywords with high search rates (but low competition). Choose short-tail keywords (such as kid), long-tail keywords (such as adolescent children’s books for sale), and local keywords (such as children’s books for sale in Biloxi) to work into your content. Use keywords to optimize your titles, URLs, and the usability of your website. All this work you are doing to optimize your on-page SEO content will be crucial to improving the visibility and traffic of your website.
You Can Create SEO Opportunities Off-Page
Off-page SEO refers to actions taken outside of your own website to impact your rankings within search engine results pages (SERPs). Backlink building is a popular tool for establishing off-page search engine optimization. There are many tactics for backlink building. Some of the current best practices include guest blogging, advertising, creating a lot of high-quality content to be shared, and using influencer marketing in your content. You will need to network to start building backlinks to your website. Networking and backlinks are great ways for your target audience to find out about who you are and what you do. Take advantage of collaboration opportunities!
Search Engines Love Websites With Quick Load Times
A responsive and speedy website will make a user-friendly experience for all your mobile and desktop visitors. By increasing the load speed of your website, readers will be able to browse longer, decreasing your website bounce rate. You should find out what your website’s load speed is before you decide to make any changes for search engine optimization. If it ain’t broke, do not fix it!
Word of advice for pages with low load speeds: if your load speed is low, take steps to improve your speed by optimizing high-resolution images, fixing JavaScript issues and excessive HTTP Requests, and bad hosting.
Think about it: you have spent a lot of time putting content on your website. It would be a disappointment if your audience cannot access (or gives up waiting to access) the content because the website/page does not load.
Some things to remember about SEO:
- SEO does not happen overnight
- search engines are not perfect
- You do not have to be an expert to optimize your website content
I recommend researching and using SEO tools to continue learning how to use search engines to increase website traffic and brand awareness. Websites like Moz and Semrush have been extremely helpful for me and my journey to understanding SEO. There are plenty of SEO courses and e-books to help you create a consistent SEO strategy plan for optimizing your content, increasing traffic, and reaching your target audience.
I have been working to understand how SEO works for years, and each time I learn something new about how important it is to rank (and rank higher) on search engines. The more elements of SEO we incorporate into our growth strategies, the more opportunities for increasing brand awareness, visibility, and site traffic.
What do you think about SEO and its importance to organic website traffic? How will you use SEO to help grow your website? What else do you think is important to know about SEO and search engines? What advice would you give someone who wants to rank higher on search engines and increase website traffic?
Leave me a comment below.
-
Wash Day Routine For 4c Hair Optimal Hair Growth
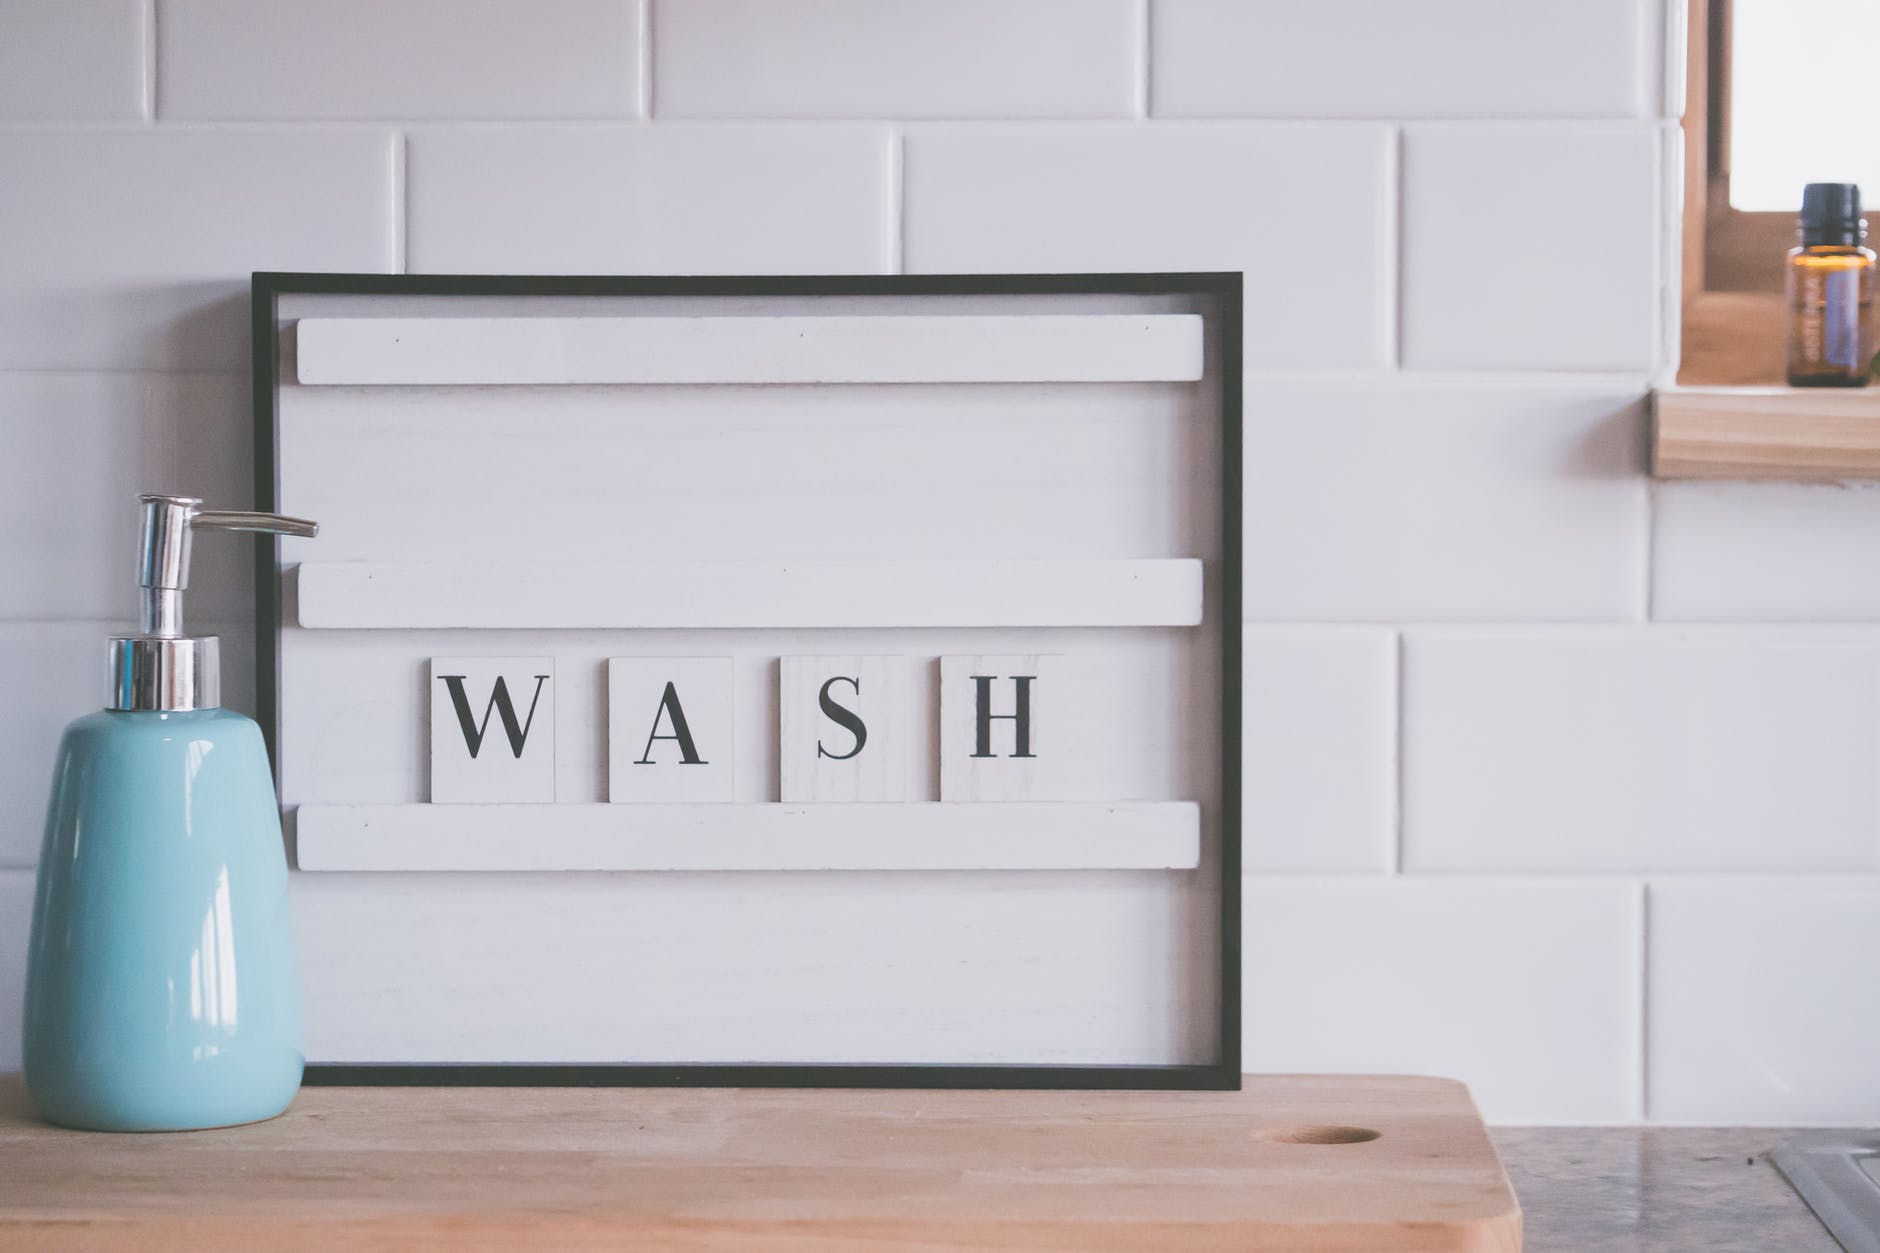


Wash days, for me, are all about using the right products for optimal hair growth and hydration. Being a naturalista for eight years has taught me the importance of managing my 4C hair and understanding which products are best for my hair type. If you have ever wondered whether you’re using the best products for your natural hair, you aren’t alone out here. I never imagined I’d be learning how to wash my hair all over again at my big age! In addition, my wash day routine has varied and changed several times throughout my natural hair journey. However, getting my wash day routine to where it is now has made washing my hair less of a nightmare and more of an adventure. The process is all about the products and the routine. As a result, I have developed an effective wash day routine for my 4C Hair.
Disclaimer: Heads up! My posts contain affiliate links. If you buy something through one of those links, you won’t pay a penny more, but I’ll get a small commission, which helps keep the lights on. Thanks!
Wash Day Routine for my 4C Hair
- Scheduling
- Detangling
- Shampoo
- Conditioner
- Drying Method
- Moisturize & Style
Scheduling
I don’t have a scheduled day for wash days. I used to wash my hair every Saturday. But after hair length and growth, the frequency changed to every 2-3 weeks. So, dedicating time for your hair is just half of this battle. In other words, your wash day schedule is subject to frequent changes and moderation.
Detangling
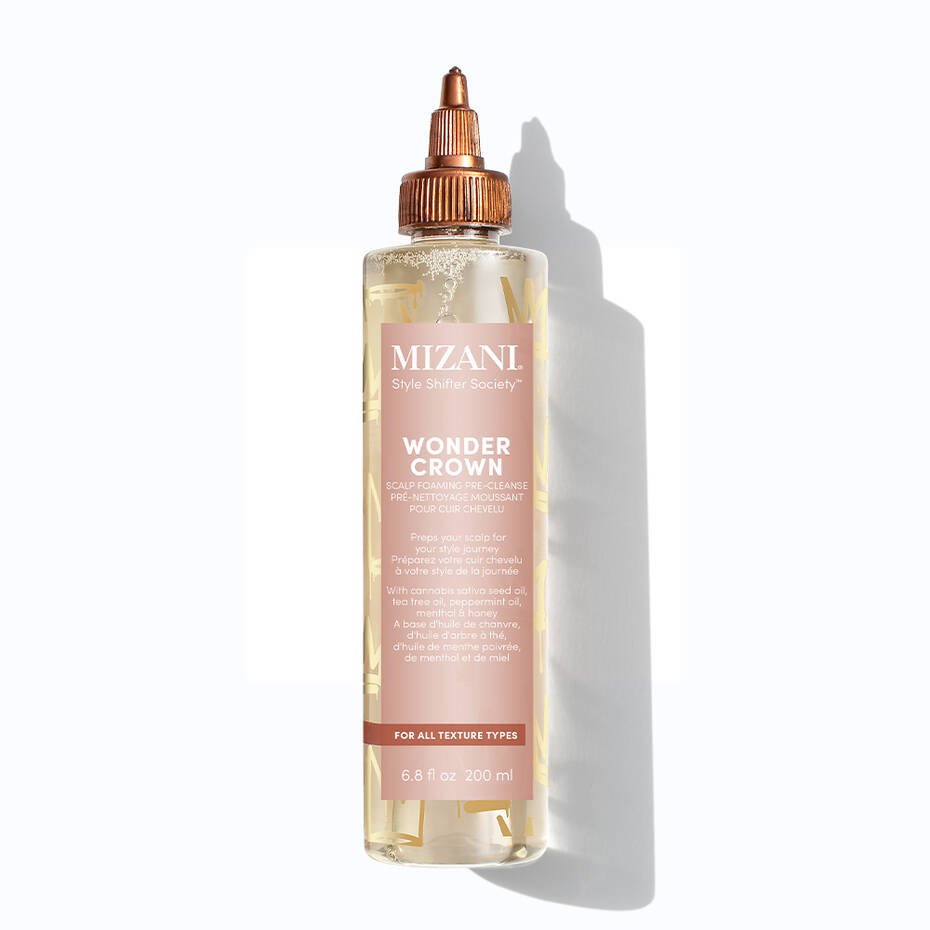
This step takes about 10-15 minutes. Before beginning to shampoo, I section my hair into four parts. Then, I saturate my hair with a Scalp-Foaming Pre-Cleanse to gently remove any knots, mats, tangles, and product dirt buildup. I never attempt to detangle without saturating my strands first. So now my 4C kinky coils are now ready for the shampooing process.
Shampoo
After I comb and rinse out the Scalp-Foaming Pre-Cleanse with a detangling comb, I use Rosemary Mint Strengthening Shampoo to nourish my tresses. Then, I lather a generous amount of shampoo in my hands, and massage the shampoo down the length of each coil and rinse. Therefore this process takes approximately 10 minutes.
Conditioner
The next step is to gently smooth an Intensive Conditioning Treatment all over my freshly washed tresses. First I gently work it all over my hair with a detangling comb to lock in moisture, and this also helps prevent any hair damage. Then I place a plastic cap over my hair and sit under the dryer for 15 minutes. After rinsing the Intensive Conditioning Treatment, I use a Biotin and Collagen Conditioner for additional hair hydration and rinse after 2-3 minutes.
Drying Method
Next I grab a dry towel to squeeze the excess water dripping from my curls. Occasionally, I prepare my hair for styling while it’s still a little damp. Sometimes I will use a blow dryer to finish drying my wet hair. However whichever method I decide to use takes approximately 3-5 minutes.
Moisturizing and Styling
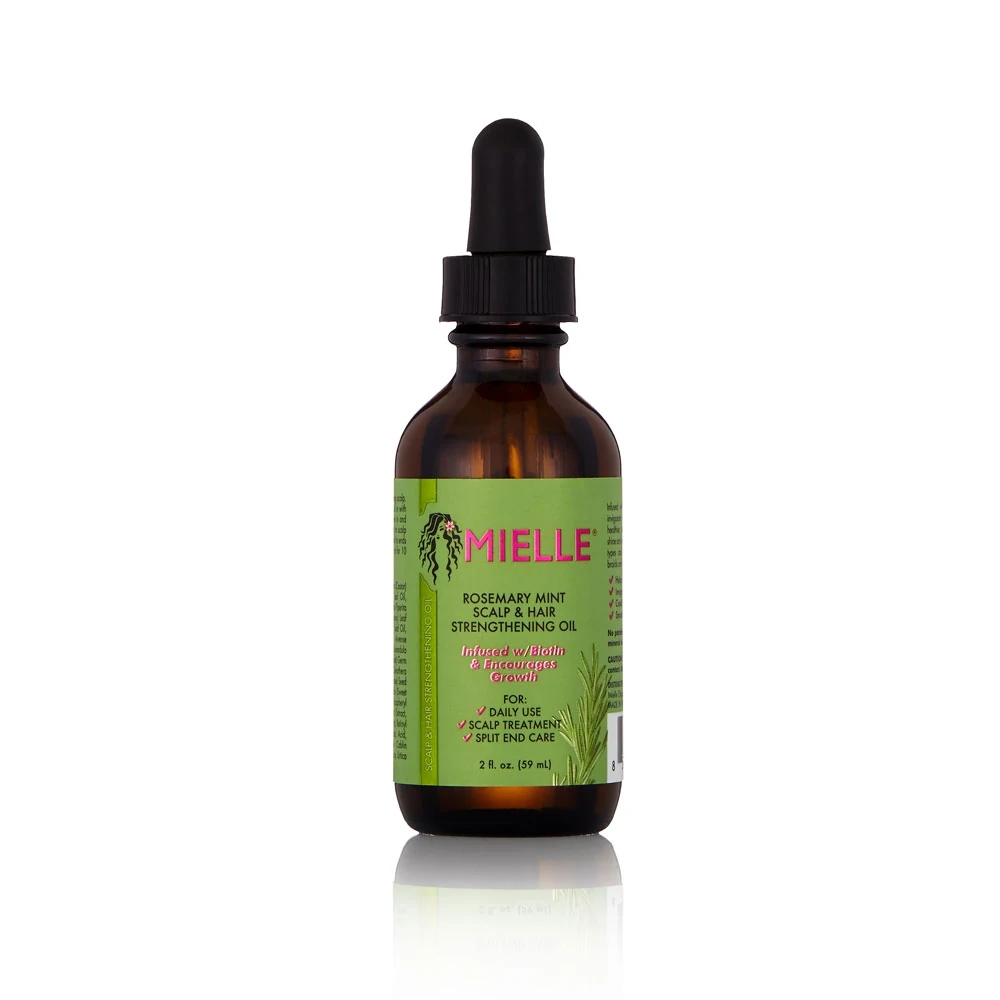
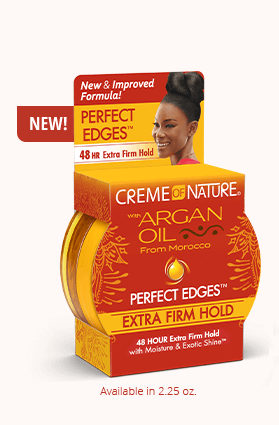
After drying off my hair, I add a leave-in conditioner and start sectioning my hair for styling. Meanwhile, I use Rosemary Mint Scalp and Hair Strengthening Oil to treat my scalp and take care of any split ends. Then, I use Style and Shine Foaming Mousse to flat twist my hair. Consequently I then go to my favorite protective hairstyle is two jumbo flat twists, with a part right down the middle.
Overall, it takes approximately 60 minutes to complete my wash routine for optimal hair growth and hydration. Consistency and repetition have made this routine become a quicker process.
4C Wash Day Routine Products
Creme of Nature Argan Oil Perfect Edges (Extra Firm Hold)
Creme of Nature Argan Oil Style and Shine Foaming Mousse
Creme of Nature Argan Oil Intensive Conditioning Treatment
Creme of Nature Argan Oil Strength and Shine Leave-In Conditioner
Mielle Rosemary Mint Scalp & Hair Strengthening Oil
Mielle Rosemary Mint Strengthening Shampoo
Mizani Wonder Crown Scalp Foaming Pre-Cleanse
OGX Thick & Full Biotin and Collagen Conditioner
Click to get a product guide to all the products for wash day. The Lewk Digest product guides give details about each product. The Lewk Digest has product reviews, prices, store locations, coupons, and discount codes to make shopping for these products easy. In other words, The Lewk Digest makes shopping easier.
How long does your wash day routine take? What are your wash day secrets and products that you like to use? Let me know what your wash day is like and what products you’re using in the comments!
-
Should I Trademark My Online Business Name?

Your name is your superpower. What you call yourself (personally or professionally) is your unique identifier. Your name, aka your identity, sets you apart from people/ businesses with similar names. Entrepreneurs realize that it takes hard work to establish their brand and create an identity different from their competitors. So, how will you stand out without blending? How will you organically grow your business? As a result, business owners must establish their rights to ensure that their name is one of a kind. Therefore, it is important to trademark your online business name.
Scroll on to learn why you SHOULD trademark your online business name. Learn how to start the trademarking process and resources to help you start trademarking your business or brand today.
So, what is a trademark?

A trademark is a symbol or word(s) legally registered or established by use as representing a company or product. Registering a trademark helps protect a name or brand from intellectual property theft or misuse as a business grows (Forbes). The U.S. Patent and Trademark Office website is where entrepreneurs can go to begin the trademark application process, search the trademark database, and check the status of a trademark. Filling out the trademark application is an easy beginner’s first step to trademarking your business.
How does a trademark help my business?
It gives you a legal avenue to protect your business or brand from copycats replicating your identity. Trademarking your business name, product, or symbol can protect you from scammers looking to make a profit off of your name. In other words, a trademark establishes your exclusive business owner rights to use your name, symbol, or word(s). Trademarking also helps you run a successful company. You will also be able to use the ® symbol next to a successfully registered trademarked name. Completing your trademark registration will make it much easier to file for trademark registration in other countries.

I have an LLC, sole proprietorship, and DBA business. My brand is already protected.
That’s great that you formed your online business. However, you should still decide to trademark your business or brand. A trademark is different in the sense that:
- Forming an LLC (limited liability company) only protects you from individuals using your business name/symbol in your state. It does not protect you nationally or internationally.
- DBA or doing business as; only protects you from individuals using your business name/symbol in your state. It does not protect you nationally or internationally.
- A copyright will protect original artistic and literary works. Copyrights apply to logos but usually do not apply to names.
How to Trademark Your Business Name
Here’s how you can start trademarking your online business today:
First, remember filling out the application is the initial step. If you do not have the necessary information for your application, an attorney can help you with this step. Next, you should figure out what trademark class you want your business’ name or symbol recognized in before submitting your application. (There are 45 trademark classes, and each trademark class covers a wide range of goods or services.)
Example: If a beauty company with the name “Enchanted” wanted to register this name in the cosmetics trademark class, it could. However, if this company also produced jewelry, it might require an added listing in the jewelry trademark class. Therefore, the beauty company has to file for each trademark class that the business will be listed under.
Additionally, if you want to trademark the same name for multiple classes, it might be a little costly. It costs as low as $250 to file a trademark application. To file for a trademarked name for multiple classes, that’s $250 for each trademark class.
Attorneys Can Trademark Your Online Business Name
Sometimes it is best to talk about things like this with your lawyer or attorney. If you are not sure how to fill out your trademark application, schedule a time to consult with your attorney or lawyer. If you do not have an attorney or lawyer, I have an available online resource for you.

Attorney Kiara Taite is a licensed Mississippi trademark attorney dedicated to protecting your legacy. She provides her trademark services to business owners and entrepreneurs anywhere in the country!
Attorney Taite is an attorney equipped to help you understand why trademarking your online business is key to protecting your brand, filing the trademark application, explaining trademark classes/ fees in greater detail, and getting your business trademarked.
If you are looking for quality legal service in the U.S., then look no further. The Law Office of Kiara Taite’s mission is to ensure that clients are equipped with the knowledge, tools, and quality legal representation required to create, protect, and preserve the legacies they intend to leave behind for their children, loved ones, community, or the culture. Visit the Law Office of Kiara Taite website to learn more about her services, fees, and to schedule a time to consult with her about trademarking your online business today!
Enjoying these trademark tips? Check out these similar posts for online business tips:
-
This Is What My Stay-At-Home Mom Schedule Looks Like

I never believed that this would be the life for me. The life of a stay-at-home mom. Never in my wildest dreams did I think that the stay-at-home life would be something that I could afford to do or that it would be something that I could get comfortable doing. The pandemic forced me to see that I could create a stay-at-home mom schedule. I literally lost my job and became a stay-at-home mother overnight! Before this, I used to spend most of my time at work. Away from my family. Since 16, I have worked countless jobs for financial stability and security. While all the while, I was missing out on quality bonding time and precious milestones. Then four years into my son’s life, I suddenly became more accessible and available.
So I was at home, all of the time, 24/7.
Related: Social Distancing: Choosing to Self-Care & Keep the Faith

Subsequently, I have been dedicated to a stay-at-home mom schedule that allows me to work from home, start and build my business, complete household chores, and devote time to my husband and son.
The ultimate goal for my stay-at-home mom schedule was to have time to do it all.
Having no extra help made me realize that I needed to follow a schedule that could keep me organized and focused on my priorities: starting a business and being there when my family needed me the most. A flexible stay-at-home mom schedule would become my secret weapon, and it continues to be a routine that brings contentedness and peace. My daily stay-at-home mom schedule works well for me, and I want to share it to help other stay-at-home moms figure out a rhythm to juggling everything at home.
5:15 am
I set my alarm to wake up 45 minutes before Landon gets up. Starting my day earlier allows me to get mentally and physically prepared for my day. I like to use this time for prayer and quick stretching exercises. Then, I will start ironing school uniforms and making Landon’s lunch to take to school. I will use any remaining time to let our family pet, Pablo, outside to use the potty and put food in his bowl.
Early mornings set the tone that I am ready to tackle anything. It also allows me to finish all my tasks at a reasonable ending time. I don’t even sleep in late! To be honest, I can’t sleep past 7 am without feeling unproductive. I like to maximize my time in the mornings by choosing not to waste a single minute.
6:00 am
I wake Landon up and make him breakfast. I’ve got to brag that I do my best gentle parenting in this hour. I want to make sure I am helping my son start his day with some positivity. There’s lots of hugging, smiles, and I love you‘s exchanged during this time. In conclusion, 6 am is one of my proudest hours of the day.
Related: 20 Affirmations for Abundance & Success
6:50 am
It’s time to drop Landon off at school for the day. Morning drop-offs are usually 10-15 minutes long. While we are in line, waiting to make our way to the front, Landon and I will practice repeating daily affirmations. I like to encourage Landon to have a great day, believe in himself, give his best effort, and commit to learning new skills. This type of encouragement is the final preparation before he walks through those school doors to begin his day as a Kindergarten student.
7:15 am
After drop-off, it’s time to get started with work. Before I shift into work mode, I take 20 minutes to eat a light breakfast, let Pablo outside again, and do those things that I might have skipped earlier (prayer, stretching, meditation).
8:00 am
After that, it’s time to dedicate myself to my brand, my business, and evolving as an entrepreneur. From 8 am to 1 pm., I give my all to writing new blog posts, creating YouTube videos, Reels, or TikToks that could help increase awareness about my business, scheduling or creating content, reviewing products, editing, etc.
I maximize my time during these hours because I can complete the bulk of my tasks without any distractions. No one is here to disrupt me or feel like I am not giving them any attention. I am prioritizing my business and my clients. I will schedule all of my consultations, client calls for social media management, and brand strategy between these hours.
1:00 pm
At this point in my day, I realize that I’m either hungry (if I’ve skipped breakfast) or feeling like I need to take a break. I usually make myself some lunch and watch something on tv, catch up on social media, or take a nap. Just because I can’t sleep in late doesn’t mean that I don’t know how to go lay down somewhere in the middle of the day.
1:55 pm
After a much-needed recharge, it’s now time to get Landon from school. School dismisses for each day at 2:55. However, parents of car riders line up an hour early to prepare for dismissal.
In conclusion, sometimes your schedule will have events that throw curveballs in your plans.
Expect this. It’s okay.
For example, waiting to get my child home from school takes an hour out of my day, but I choose to look at this differently. Instead of viewing this as me losing out on time, I will use this time to finish up something that I was working on or do something that I haven’t had the chance to do yet.
Examples of Time Fillers for “Lost Hours”
- creating captions for Instagram posts/ reels
- researching blog topics and ideas
- researching youtube video topics and ideas
- pay a bill online
- watch an episode of a tv series
- digital planning
3:00 pm
I’m back at home and back to full-time mama status. This hour belongs to Landon. He usually has so much to tell me about what happened at school! We also have snacks, do homework, and go outside to play before it gets too late.
4:00 pm
It’s almost time to end my work for the day. I wrap up anything that I didn’t finish that morning. Every day is different. On some days, I can say that I finished my workload by 5 pm, and on other days I can’t. Wrapping up the day helps me understand what I’ve already accomplished for the day, what’s left to do, and where to pick up the next day.
4:30 pm- 5:00 pm
It’s time to start making (or buying) dinner. I’ve never been into meal prep, but perhaps it’s time that I start; because I never know what’s for dinner! Most of my dinner ideas come to me throughout the day. At 5 pm, I am cooking dinner or asking my husband to grab something on his way home.
7:00 pm After everyone has made it home and had dinner, I get a little bit of free time. It is the ultimate hour for relaxation and chill time. I dedicate this hour to doing whatever I want to do.
- conversations with my husband about his day
- bonding time with my husband, Landon, and Pablo
- taking a nice hot shower
- browsing social media
- listening to music
- preparing for the next day (pulling out school uniforms, making lunches, cleaning up)
8:00 pm This is Landon’s wind-down hour. His dad bathes him, and after bath time, we read a 15- minute bedtime story. I appreciate this time to be able to take a break and regroup.
9:00 pm It’s Landon’s bedtime and his parents’ bonding time. Both mom and dad are exhausted by now, but we still make time for each other. We have to because we hardly have any time earlier in the day to make it work.
10:00 pm If I want to get up for my 5:15 am alarm, I need to be in bed no later than 10 pm.
More Tips for Success
- Don’t get wrapped up in exact times! These are the hours that work best for my life at home, and I provided them for structure.
- Find your rhythm and rhyme for your reason. You’re crafting the ideal schedule for your life and goals.
- You can still be productive throughout the day even if you don’t stick to a strict routine.
- Plan around family bonding time. Choose the repeat times throughout the day for consistent, fun times with your loved ones.
- Most importantly, don’t stress on days where following your schedule does not work out.
-
3 Cute & Easy Hairstyles Using Headband Wigs

I love whenever I make a new cute hairstyle discovery! When I decided to go natural a few years ago, I never thought I would struggle to find protective hairstyles. It has been hard for me to find protective styles for curly, natural hair that I like! Why is it so hard to find cute and easy hairstyles to protect and support my hair’s health and growth? Why is it so hard to find protective styles that will keep edges safe from thinning out?
It should not be this way!
Disclaimer: This post contains affiliate links. If you buy something through one of those links, you won’t pay a penny more, but I’ll get a small commission, which helps to keep the lights on! Thank you!
Who doesn’t love cute and easy hairstyles?
Wigs and braids have made styling my curly hair less of a struggle. I love using wigs and braids to switch things up. Wigs are a preferred protective style because they are generally quite simple to wear and don’t require much maintenance. After reading reviews online about different wigs, I decided to try a new style that I’d never heard of before: headband wigs.
Headband wigs work to protect natural hair and edges. As a result, this wig is the answer to all of my haircare prayers! The quality of my natural, curly hair life increased by 100 points after wearing this wig for the first time.
Here’s why…

This wig has been the most manageable and convenient wig I have ever worn. The headband makes it easy to slip on over your natural hair without much maintenance. In addition, the biggest flex here is that no glue is necessary for this wig! It’s my favorite benefit of the wig because I know that my edges and natural hair will be 100% protected. Sometimes I like to take a break from wearing wigs that require a glue application. Therefore this headband wig continues to check off all boxes for convenience, ease, and support!
More About Headband Wigs: Cute and Easy Hairstyles
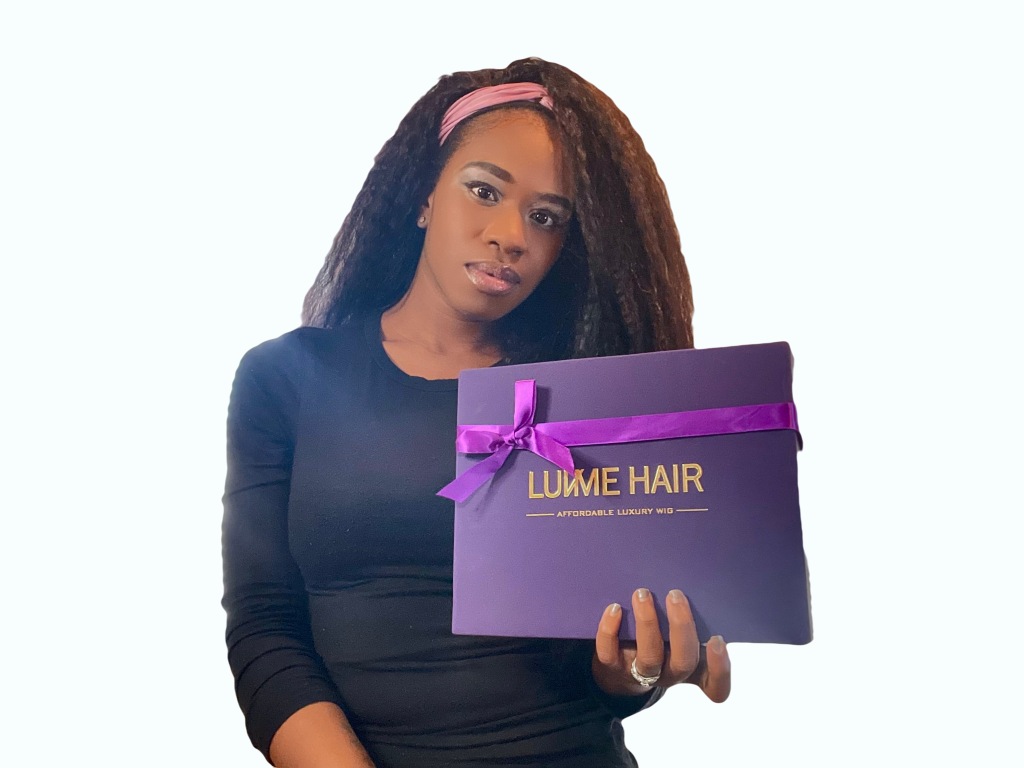
I got my 22″ Kinky Straight textured headband wig from LuvMe Hair. I chose the kinky straight-textured wig because it matches my hair type and texture (4c). My wig came in a beautifully packaged box that contained:
- Additional headbands and hair accessories
- Iridescent cosmetic bag
- LuvMe Hairclip
- Bobby pins
- Wig Cap
- Wig Care Instructions
- Hair Wrap
- Edges Brush
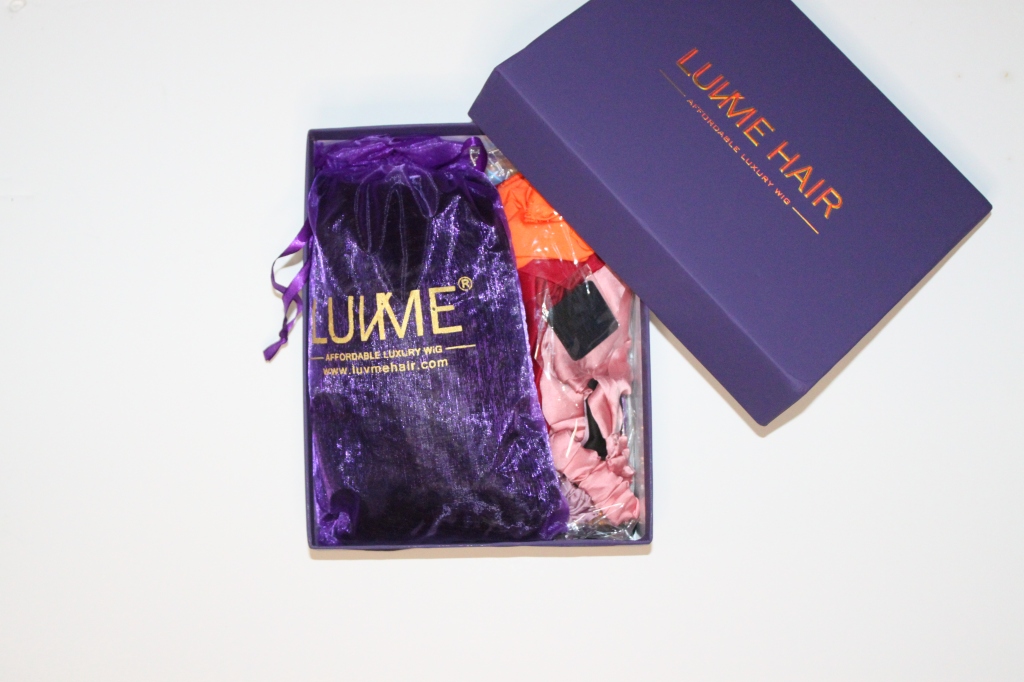
The wig came with everything that I needed to style it. I put this wig on and styled it in less than 15 minutes! So, let me show you how I did it.
Keep scrolling to reveal the long headband wig and easy hairstyles you can recreate using headbands.
To Achieve Cute and Easy Hairstyles Using Headband Wigs, You’ll Need
- wig cap
- wig w/ clips and headband straps
- extra headbands and accessories for styling
Firstly, I brushed my hair down using curl-enhancing mousse and styling gel for it to stay nice and slick. Next, I used bobby pins to secure the hair in position before placing the wig cap on top. Then, I pulled the detachable straps to the headband apart to put on the 22″ kinky straight textured wig. To get it perfectly adjusted on my crown, I secured the wig using two techniques: the wig clips and reattaching the headband in the back. That’s it! Again, you can do this in under 15 minutes.
Then, I started to play with other ways to style the wig. I just wanted to play around with it to see what I could come up with and what kind of fun looks to create with it. My favorite thing that I love about the wig is that you can switch it up at any time with this headband wig. I can put it all to one side, up into a ponytail, half ponytail, wear it in a bun, or switch out the headbands with the extra ones that I got from LuvMe Hair. In addition to my review, you can watch the video for my hair tutorial for the 22″ Kinky Straight Headband Wig on YouTube for more guidance on how to rock this wig and how you can style it.
Wearing the headband wig with one of the extra headbands that it came with. 
Headband Hairstyles: Wearing the LuvMe Hair headband wig as it is (kinky curly) 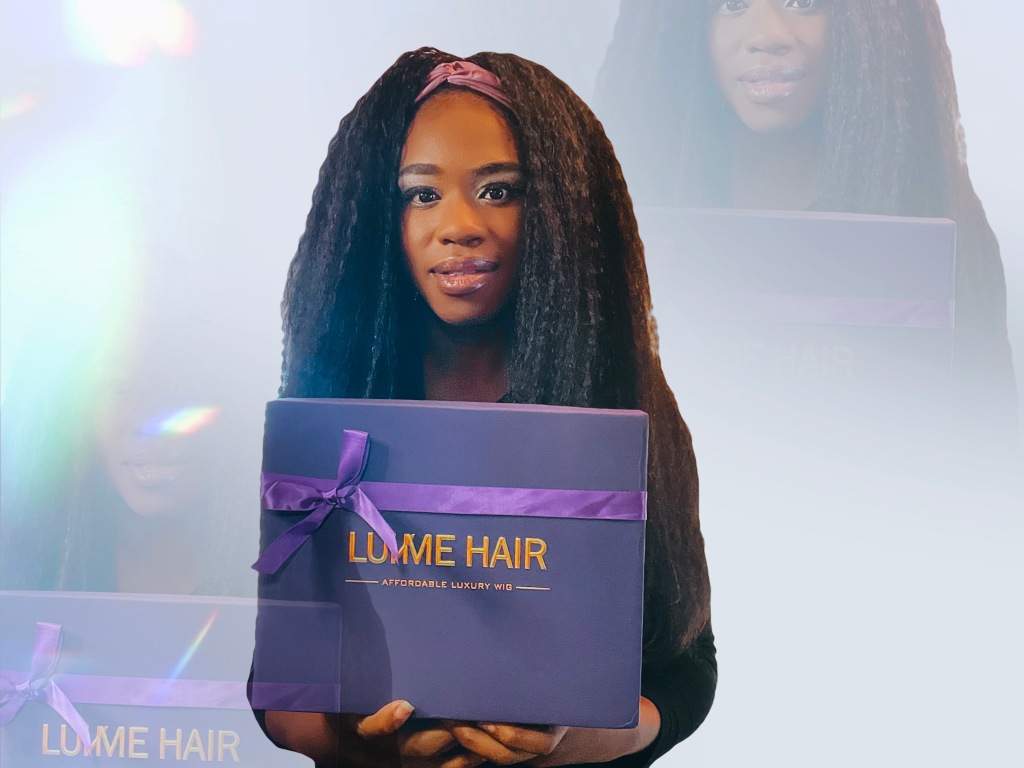
Headband Hairstyles: Wearing the headband wig with a middle part and headband. Wig Hairstyles Are Easy To Achieve!
I honestly love everything about wearing headband wigs as a protective style. It’s perfect for someone like me who loves convenient, cute, and simple hairstyles. I can still look cute while protecting my natural hair and my edges. It is so versatile and gives plenty of inspiration for switching up my hairstyles whenever I want. I’ve finally found the ideal protective style for me.
I believe that the headband wig could help any naturalista looking for protective hairstyle solutions and inspiration. It is not too good to be true, ladies! You can achieve this simple look too!
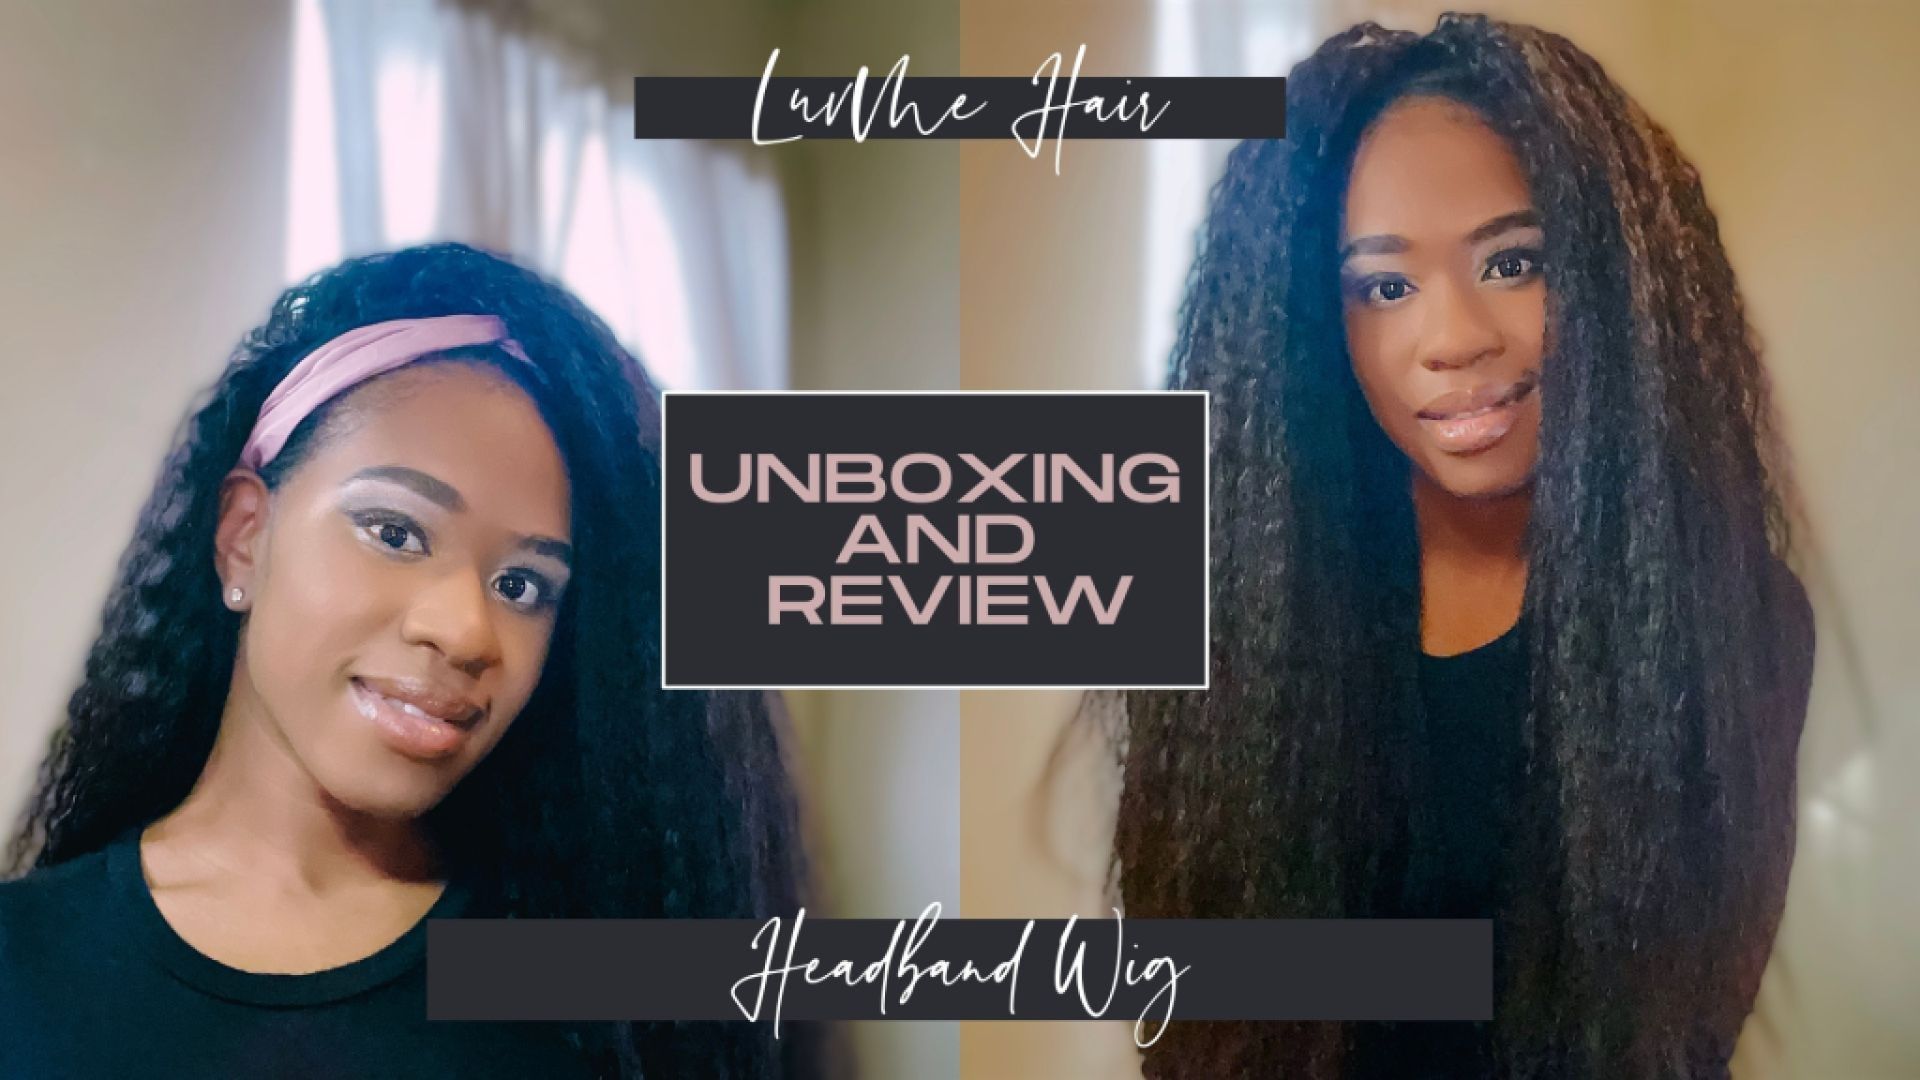
Watch my LuvMe Hair Headband Wig Tutorial and Review on Youtube What do you think?
Visit luvmehair.com to check out the 22″ kinky straight headband wig and to view other textures from the collection.
I even have a referral code for you to take something off of your purchase once you’ve found the wig for you. Just use offer code KRIS at checkout to get 23% off of your LuvMe Hair wig purchase.
Comment with some of your favorite time-saver protective hairstyles below!
Check out more beauty and haircare posts: